
Do not index
This Marvel SNAP Pool 2 Deck guide is part of a compendium of decks new players can create and improve. The core idea of this guide is to help the new player experience by giving tips on how to play these decks and enhance them as you complete your Pool 1 Marvel SNAP collection by acquiring new cards.
The full list of decks can be found in these specific articles: Pool 1 decks & Pool 2 decks. As an additional resource, you can sync your collection using the Untapped.gg Deck Tracker and check out our Pool 1 & Pool 2 deck pages, where you can find decks you can build right away with the cards you own. Furthermore, you can check how popular and powerful they are in the metagame with our Global stats. That being said, let’s jump into the guide.
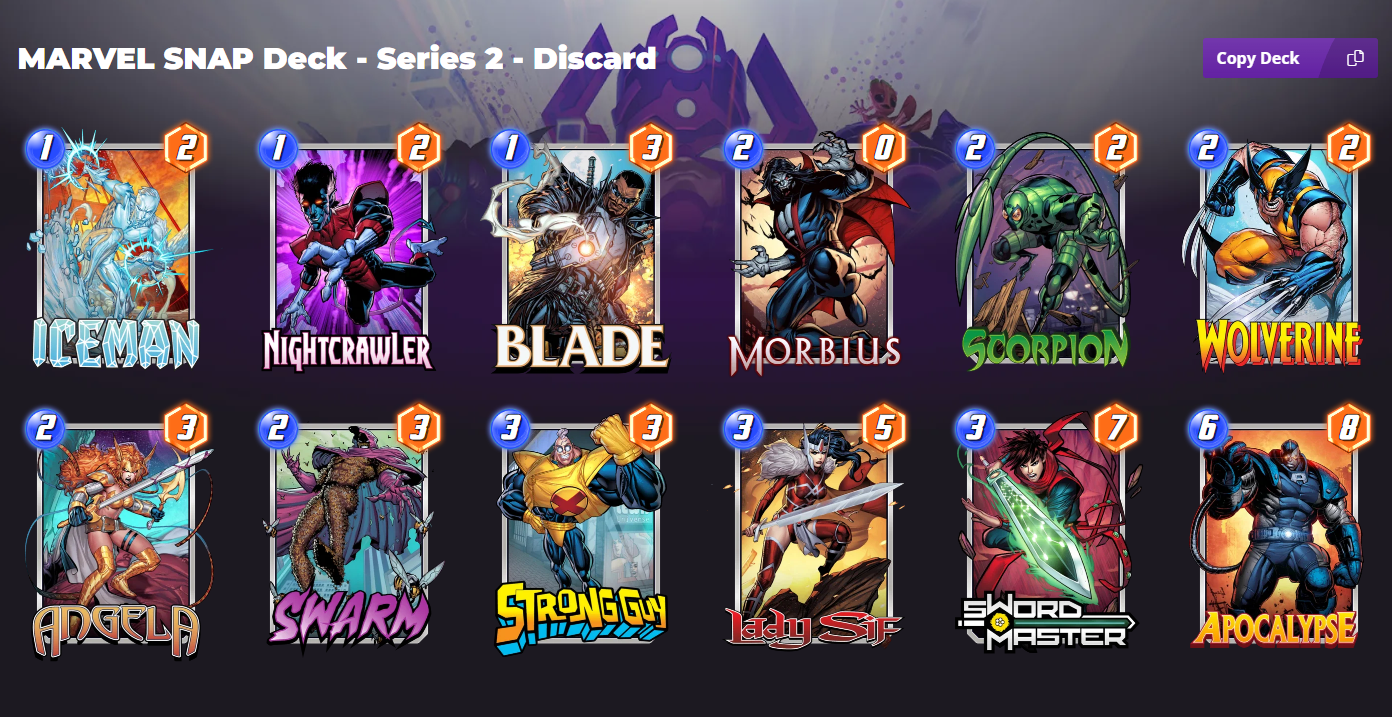
Marvel SNAP Series 2 Deck: Discard
General Gameplan
Cards like Lady Sif and Sword Master are over-statted for their cost, but come with the drawback of discarding cards from your hand. The Discard deck intends to flip those drawbacks into advantages to generate even more power by including cards that synergize with being discarded. This deck plays fairly linearly in that you want to prioritize playing your discarding cards when you can generate the biggest advantages from them, followed by playing on curve.
Card Breakdown
Apocalypse: This is our big payoff card. While below the rate for a 6-cost, Apocalypse returns to our had with more power every time we Discard him with even more power. You will regularly match Hulk-level powers with him, and the ability to have a reliable Discard target plus the ability to play our over-statted Discard cards means we'll be generating 16+ effective power from all the synergies.
Swarm: Another one of our big payoffs in this deck, Discarding Swarm gives us 2 more Swarms back at 0-cost. This allows us to have a high-burst, high-flexibility T6; we can choose to deploy our Apocalypse and our Swarms based on where our opponent played their cards on the prior turns.
Morbius: The 3rd Discard payoff card in this deck, Morbius gets +2 power every time we Discard a card. With the number of Discard abilities we have in the deck, he will regularly be a 4-power card. Because he's Ongoing, he will get the power from cards that were Discarded before he was played on the board.
Blade: In most decks, we either want to play our 1-drop cards early on, use them to spend extra energy on a turn, or (in the case of Kazoo), play it on T6 for burst; Blade in the Discard deck is different. Because he Discards the rightmost card in our hand, he wants to be played only when we are able to take advantage of that ability. You almost always want to play him when Apocalypse, Swarm, or Wolverine is the rightmost card.
Lady Sif: She is Apocalypse's best friend. The deck is constructed such that the only 6-cost card in our hand is Apocalypse, meaning so long as we draw this pair, Lady Sif will always hit Apocalypse, effectively giving her 2 more power. She's our most consistent Discard card in the deck.
Sword Master: Coming in at slightly more power than Lady Sif, Sword Master is the biggest RNG Discard card of all of them. He will usually be played if we either don't have Lady Sif or Blade in hand, or we have a hand that has a lot of cards that want to be Discarded, mitigating his RNG downside.
Wolverine: He serves as another card that wants to be Discarded. When hit by such an effect, he is effectively a 0-cost, 4-power card that plays in a random location. Additionally, he can be played proactively into locations like Death's Domain or Altar of Death to allow us to trigger his ability and save our Discard cards for other targets.
Strong Guy: Another payoff card for discarding cards, Strong Guy generates a lot of power for his cost. Typically, you'll want to play him into a different lane than Morbius to spread your power. You will also have to be conscious of how many Swarms you generate, as enough restrictive locations can leave you with an inability to empty your hand enough to trigger his power.
Angela: Angela provides a way to take advantage of a lot of the smaller power cards we have in our deck, like Swarm and Scorpion; she will regularly get to 6 power. Additionally, if you play Nightcrawler into her lane and move him afterward, you can get her even higher.
Nightcrawler: He is a great 1-cost card, providing us a way to increase the power of Angela even further, as well as a way to get power into difficult locations using his movements, such as Death's Domain or Sanctum Sanctorum.
Iceman: He provides great disruption to your opponent's gameplan, as well as serving as a cheap way to pump out Angela's power. Also, the ability to play him out cheaply means that we can more regularly have our Discard cards hit our payoff cards.
Scorpion: Scorpion is included in this deck as a cheap, good, filler card. At 2-power, when played he will regularly hit 3+ cards in the opponent's hand. You can think of him as an effective 4+ power card due to the negative debuffs he applies while serving as an easy way to pump Angela.
Substitutions
Example Game Sequence
T1: Iceman/Blade/Nightcrawler
T2: Morbius/Angela/Scorpion
T3: Lady Sif/Sword Master/Strong Guy
T4: Sword Master + 1-cost/Lady Sif + 1-cost
T5: Play as much power out as possible except for 0-cost Swarms
T6: Apocalypse + Swarms/Strong Guy + Swarms + 3-cost
For more Pool 1 and 2 Marvel SNAP Dino decks, you can check our Decks page to find those you can build with your collection
Additional Resources
About this article
This article was written by several contributors from the Marvel SNAP’s Official Discord Wiki Team. The Wiki Team is a group of community members who work on and contribute articles to Marvel SNAP’s Discord Wiki. Learn more about this program.
Post Changelog
- [4/13/2024] Introduced
Contributors
[TVN] Crash I $48 Spent
Sigphale
Q